Monday, May 4, 2015

Farro and Lentil Vegetable Curry Soup


Farro and Lentil Vegetable Curry Soup
How I Did It:


1 onion, chopped
2 cloves garlic, diced
3/4 cup farro
3/4 cup lentils
32 oz low sodium Vegetable Broth
28 oz finely diced tomatoes
3 ribs celery, chopped
5 carrots, chopped
2 parsnips, chopped
1 tsp ginger
1 tsp lemon juice
2 tbsps + 1/4 tsp curry powder
1/4 tsp red pepper flakes
1/2 head cauliflower, large chopped
8 oz spinach, roughly chopped


1. Heat 2 tablespoons of water in a large pot and then throw in the onion and garlic. Cook for about 15 minutes, stirring occasionally and adding more water as needed.

2. Pour in two cups of water and bring to a boil. Stir in the farro and reduce the heat to medium. Cover with a tilted lid (to let out some steam) for about 15 minuets and then add the lentils, celery, carrots, and parsnips. Add more water as needed to keep cooking for another 10 minutes.

3. Add broth and tomatoes. Stir to combine and then stir in the ginger, lemon juice, curry powder, and red pepper flakes.

4. Cook for about 5 minutes, add the cauliflower, cook for another 5 minutes or until vegetables are the tenderness that you prefer.

5. Stir in spinach and let it cook down for a couple minutes. Serve.

Wednesday, April 29, 2015

Rosemary and Sea Salt Soft Pretzel Bites


Pretzels are one of those snacks that are generally liked, but are quickly overlooked for something better. Even a cracker is more exciting than a pretzel. Well, now remove your store bought crunchy pretzels and bring in the soft fresh baked pretzels. You may have had one at the mall, but hopefully you have been lucky enough to try one at a restaurant with some great dipping sauce or at a festival with a beer. Now that is a pretzel worth going out of your way for. 


With that type of pretzel in mind I scored the internet until I found a recipe that looked like what I wanted. As it turns out pretzels are pretty easy to make! It may seem like there are a lot of steps, but all of the steps are pretty easy and just look at the simple ingredients list. You do need yeast, but what a great excuse to make some bread after...or more pretzels! For something that is mostly just white flour and water, they are amazingly tasty....and what texture! I decided to make these savory, but you could also sprinkle them with cinnamon and sugar.


Rosemary and Sea Salt Soft Pretzel Bites

Adapted from Sally's Baking Addiction

How I Did It:


1 1/2 cups warm water
2 1/4 tsp active dry yeast
1 tbsp light brown sugar
1 tsp sea salt
1 tbsp melted butter, slightly cooled
 3 1/2 - 4 cups all purpose flour
1 egg, beaten
1/2 cup baking soda
sea salt
rosemary


1. Dissolve yeast in warm water and stir for about 3 minutes. Add sugar and stir until combined (some clumps may remain). Let it sit for 10 minutes.

2. Add salt and melted butter and stir to combine.

3. Add 1 cup of flour at a time until you have added 3 cups, mixing each addition with a large wooden spoon. Add 1/8 cup of flour at a time until the dough is no longer sticky and springs back when touched.

4. Preheat oven to 200.

5. Flour a surface and kneed the dough for about 5 minutes.

5. Turn off the oven.

6. Shape dough into a ball and place into a lightly greased bowl. Cover the bowl and place in the oven (with the heat off) for 10 minutes.

7. Remove from the oven and preheat the oven to 450. Prepare two baking sheets with parchment paper or a Silpat and set aside.

8. Cut the dough into 8 sections and roll each section out into long ropes that are about 1 inch thick. Cut the ropes into 1 1/2 inch sections.

9. While you are cutting your dough, boil 9 cups of water with 1/2 cup of baking soda (be careful if you put the baking soda in after the water is already heated up).

10. Drop about 10 pretzels at a time into the boiling baking soda water and let sit for 20 - 30 seconds. Remove with a slotted spoon and place on prepared baking sheets. They don't need much room, just make sure they don't touch.

11. Once all of the dough balls have received their baking soda water bath, brush with them each with the beaten egg and then sprinkle with sea salt and rosemary.

12. Bake for about 15 minutes or until they are golden brown. Remove from oven, let cool a bit and enjoy! They are great warm, but are good cold the next day too.


Tuesday, April 28, 2015

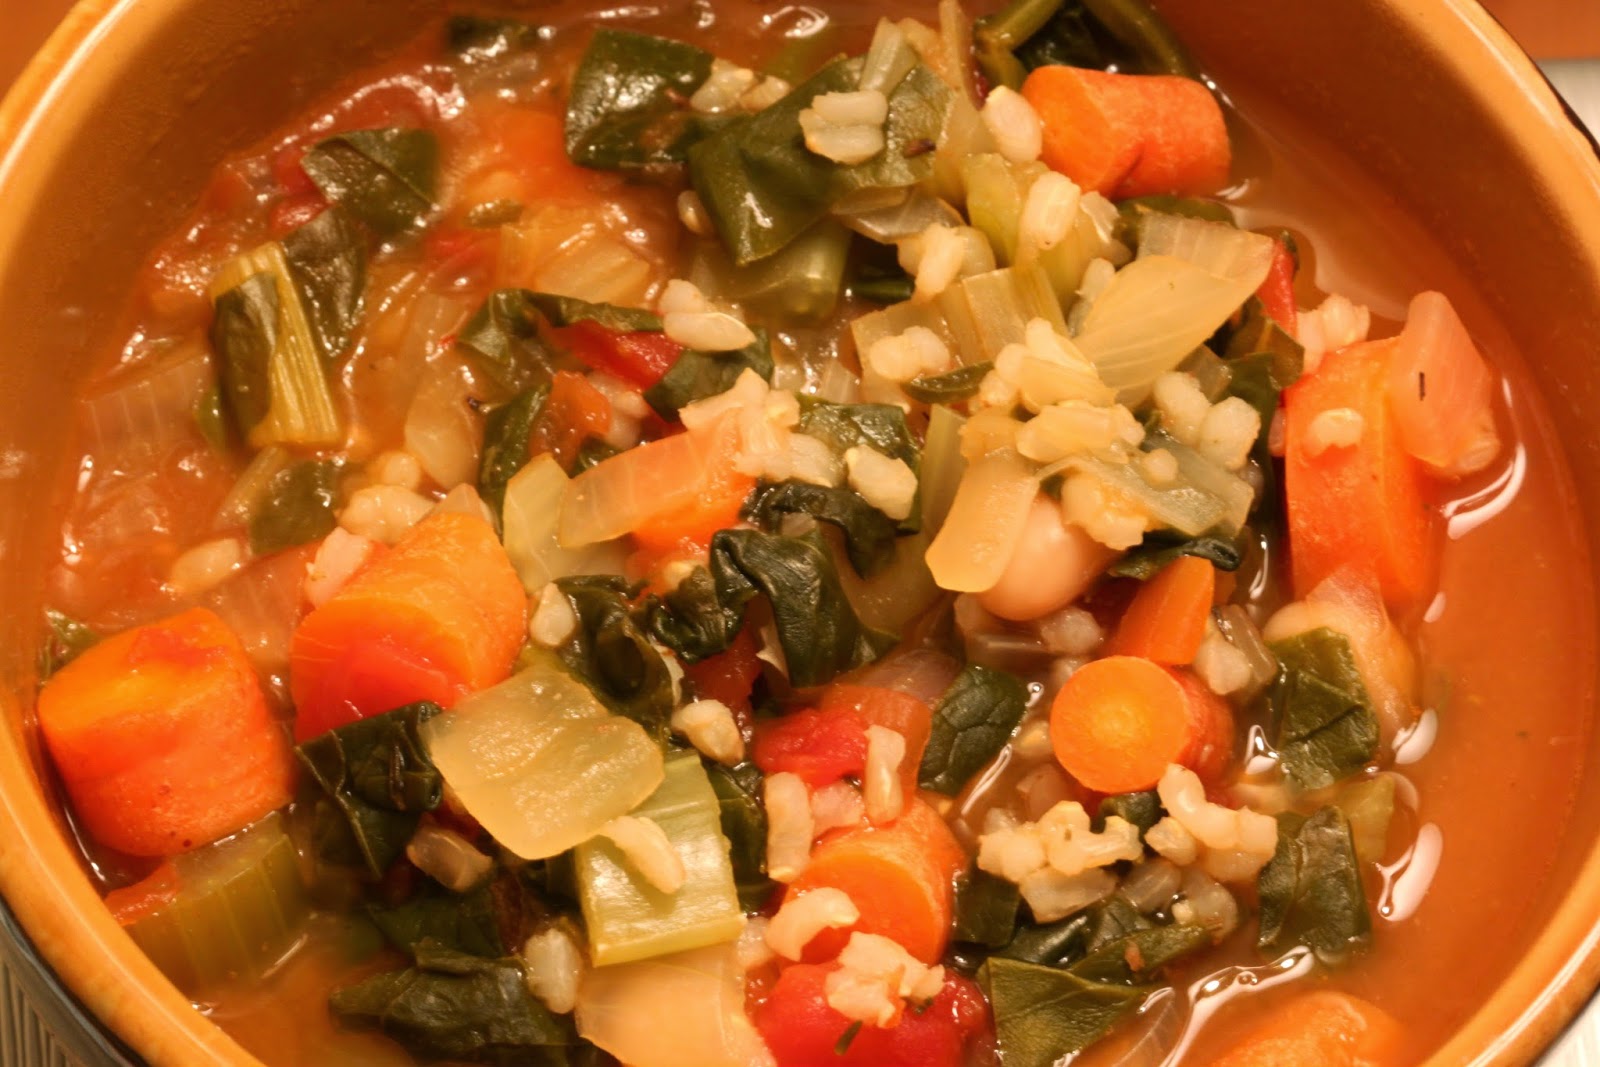
Rice and Veggie Soup


With all the super grains now being promoted everywhere, sometimes it's nice to enjoy good old rice (brown rice of course). Growing up my grandma used to do two amazing dishes with rice - tomato based risotto (with butter too of course) and rice soup. In both the star and the only feature was the rice. I was really wanting some rice soup, but I somehow can never just make a simple dish without adding lots of veggies. So I made this brothy tomato soup with lots of veggies and rice and just a hint of spice. Honestly, it's nothing like anything my grandma made, but it's delicious and very satisfying on a cold "spring should be here, but it's not" day. The photo above was from the day I made it and the photo below was the next night after the rice had absorbed more of the broth. I like a thick soup, but you could always thin it out with more broth when reheating (or add more to begin with).


Rice and Veggie Soup
How I Did It:


1 cup short grain brown rice
2 onions, peeled and chopped
8 carrots, chopped
1/2 stalk of celery, chopped
bunch of rainbow chard, chopped
64 oz low sodium vegetable broth
28 oz diced tomatoes
15 oz cannelloni beans, drained and rinsed
1 tsp thyme
1 1/2 tsp oregano
1 tsp rosemary
1 tsp red chili pepper flakes
5 oz spinach, roughly chopped


1. Bring 3 cups of water to a boil and then stir in the rice. Lower heat and cover, but leave the lid off a crack to let out steam. Add additional water as necessary until cooked.

2. While the rice is cooking, heat 1/8 cup of water in a large stock pot and add the onions. Cook until softened, stirring occasionally and adding more water as needed. Adding more water if necessary, add in carrots, celery, and the chopped stalks of the chard. Cook until slightly softened.

3. Pour in the broth, diced tomatoes, and beans. Stir to mix everything up. Stir in the thyme, oregano, rosemary, and chili pepper. Bring to a boil and then cover and lower heat,

4. Cook until your vegetables are as soft as you want them and then stir in the chard leaves and spinach. Cover and let the greens cook down,

5. Once the greens are cooked down, stir again to distribute and then stir in the rice. Cook for a couple more minutes and then remove from heat and serve.

Wednesday, March 25, 2015

Fontina Farro Risotto with Roasted Cauliflower


Have you had farro? I adore the texture - very chewy, but in a soft and welcoming way. It's high in fiber, protein, iron, and calcium making it a fun alternative to rice and even quinoa. I made farro with lemon a few months ago and was blown away and decided to incorporate into my meals more often. This is a slightly less healthy way to prepare it (cheese instead of lemon), but it is still pretty healthy and trust me when I say that it tastes amazing and does not feel heavy and cheesy. All of the flavors really work well together. I have been really into roasting cauliflower so I had to throw that in of course and it complimented everything nicely. Oh, just thinking about it makes me wish I still had some left.

Fontina Farro Risotto
How I Did It:


1 head cauliflower, sliced lengthwise into 1-inch chunks
salt and pepper
1 onion, chopped
2 cups farro
16 oz low sodium chicken broth
6 oz fontina cheese, grated
6 oz peas
spinach, roughly chopped


1. Preheat oven to 450.

2. Spread cauliflower out on a large cookie sheet and drizzing with olive olive and then sprinkle with salt and pepper (using more pepper than salt). Flip all of the chunks and repeat. Roast for about 20 minutes or until parts of it start to crisp up and it is soft.

3. While the cauliflower is roasting, heat 2 tablespoons of water in a large pot and add the onion. Cook for about 10 minutes or until soft and translucent.

4. Add farro and let cook for 1 minute while constantly stirring.

5. Add 2 cups of broth or enough to cover the farro. Lower heat and cook until the broth has been mostly absorbed (stirring frequently) before adding more broth, 1/2 cup at a time until the farro is cooked.

6. Stir in peas, spinach, and cheese and cook on low until cheese is melted and everything is well combined.

7. Cut up cauliflower and stir in, reserve a couple larger pieces for garnish.

Tuesday, March 24, 2015

Whole Wheat Coconut Chocolate Chip Cookie Bars


Sometimes I get the urge to try to make something a little more healthy. These cookie bars are whole wheat (you need to use some white flour or they will not be tasty to normal people - I have made this mistake) and in place of butter they are made with healthy and delicious coconut oil. The batter was very dry and crumbly which lead me to over-mixing these and making them a little tougher (once completely cooled) than I would have liked (out of the oven they were perfect). Even with that, I still really enjoyed them - I didn't even notice the slight toughness after the first bite. They were beautifully dense with a chewy texture and I loved the hint of coconut flavor. The density and chewiness is assisted by the lack of baking soda/baking powder (they don't rise and get fluffy). Also, due to the use of coconut oil, I think they would be much softer if the temperatures were warmer. I'll test out this theory in a few months. The coconut oil also made the edges very crisp. While I think the whole wheat gives these a hearty taste without being over-powering, if you hate whole wheat stuff, you might want to skip this one. I plan to make other variations of this in the future.

Note: I baked this in a loaf pan as I did not want to end up with too many. If you have more of a crowd, I suggest doubling and baking in a 9x9 pan.


Whole Wheat Coconut Chocolate Chip Cookie Bars
How I Did It:


1/2 whole wheat flour
1/2 + 1/8 cup all purpose flour
1/4 tsp salt
1/2 cup coconut oil, melted
1/4 + 1/8 cup brown sugar
1/4 granulated sugar
1/2 tsp cinnamon
1/2 tsp vanilla extract
1 egg
1/2 cup semi-sweet chocolate chips
1/2 cup milk chocolate chips

1. Preheat oven to 350. Place a piece of parchment paper in your pan, overlapping the edges slightly (so you can pull the bars out easily when they are cooked) and then lightly coat any of the exposed pan and the parchment paper with light oil olive (not virgin - you can also use canola oil). Set aside.

2. In the smaller of two bowl, whisk together the flours and the salt. Set aside.

3. Whisk together (with an electric beater) the oil and the sugars until well combined and then whisk in the cinnamon, vanilla, and egg.

4. Stir in the dry ingredients until just combined.

5. Stir in the chocolate chips and make sure they are well distributed.

6. Place batter into pan and press down to evenly spread it out.

7. Bake for about 20 minutes or until the edges are slightly brown and the center looks center. Remove from oven and let sit for a couple minutes before pulling out of the pan with the parchment paper.

8. Let cool to almost room temperature before cutting into bars. Store in an airtight container.

Sunday, February 1, 2015

Traditional Muddy Buddies


Need a last minute sweet Super Bowl snack idea? Muddy Buddies (a.k.a "puppy chow") are about the quickest thing you can make and they are a no fail hit! It's been awhile since I have made traditional Muddy Buddies as I have been enjoying testing out other flavor combinations, but the traditional peanut butter and chocolate never gets old or boring and after making them I can say they are just as addicting as I remember them. Other recipes you will see call for less peanut butter and chocolate and honestly, I am not sure why. I think the amounts that I use are perfect and any less would not coat the cereal enough.

See below the recipe if you are interested in other muddy buddy flavors.

Traditional Muddy Buddies
How I Did It:


9 cups Rice Chex
3/4 cup semisweet chocolate chips
1/2 cup + 1/8 cup milk chocolate chips
1/8 cup dark chocolate chips
1/4 cup butter
1/2 cup + 3 tbsp peanut butter
1 tsp vanilla
1 cup powdered sugar

1. In a double boiler, melt the chocolate chips, butter, and peanut butter. Once they start to melt a bit, stir to speed up the process. Once melted, stir in the vanilla.

2. Dump 9 cups of Rice Chex cereal into a large bowl. Pour the melted chocolate mixture over the cereal and gently stir until all of the cereal is well coated.

3. Pour the powdered sugar over the chocolatey Chex and gently stir to coat.

4. Spread out the coated Chex on a long piece of parchment paper to dry.

5. Once dry store in an airtight container for up to a week (ha, like it would last that long)


Other types of Muddy Buddies worth trying:

Thursday, January 22, 2015

Crisp and Chewy Chocolate Chip Cookies


I am all about trying out different ways to make chocolate chip cookies and these turned out just as I had hoped. They are medium thickness and are crisp on the edges and (thanks to the large amount of brown sugar) chewy in the middle - so good!

Crisp and Chewy Chocolate Chip Cookies
How I Did It:

(makes about 24 cookies)

2 1/4 cups + 2 tbsp all purpose flour
1/2 tsp baking soda
3/4 tsp baking powder
1/4 tsp salt
1/2 cup unsalted butter, softened
1/4 cup granulated sugar
3/4 cup dark brown sugar
1 egg
1 tsp vanilla extract
1 1/4 cup semi-sweet chocolate chips

1. In a medium bowl, whisk together flour, baking soda, baking powder, and salt. Set aside.

2. Beat together butter and sugars until light and fluffy (don't be impatient!)

3. Add in egg and vanilla extract and beat until well incorporated.

4. In three parts, beat in the dry ingredients until just combined.

5. Cover well and refrigerate for at least two hours (or overnight).

6. When ready to bake, preheat oven to 350 and cover your cookie sheet with a Silpat or parchment paper (not wax paper!)

7. Form dough into heaping tablespoon sized balls and place two inches apart on the cookie sheet. Bake for about 8 minutes or until the edges start to lightly brown, but the center still looks a bit unset.

8. Let sit for 2 minutes and then transfer to a cooling rack.