Showing posts with label no bake. Show all posts

Monday, March 17, 2014

Coconut Delight Bars


If you like coconut, you will love these coconut bars. I found them at Chocolate Covered Katie awhile back and I recently made them to the delight of my family. I don't really like the taste of agave on its own, but it works well in here. I think anything else would be too sweet and noticeable. The other good thing about using agave is that it makes these bars friendly to some people who can't handle most other sweeteners (sugar, honey, maple syrup). So easy to make and so easy to eat! If you want, after freezing them, you could dunk them in melted dark chocolate and then freeze them again. I say that because I always have chocolate on the brain, but to be honest, these really don't need it. They are perfect as is.


Coconut Delight Bars
How I Did It:


1 cup shredded unsweetened coconut
1/4 cup agave
2 tbsp coconut oil
3/4 tsp vanilla
1/8 tsp salt

1. Place all ingredients in a food processor and process until well-combined. This will only take ten seconds or so.

2. Pour into the bottom on a loaf pan and press down evenly.

3. Cover and place in the freezer for 20 minutes before cutting into squares. Store in an airtight container in the freezer.

Saturday, January 11, 2014

No Bake Chocolate Peanut Butter Oat Cookies


I don't remember how I stumbled upon these, but I had them bookmarked to try for awhile now. They are very interesting. They weren't nearly as peanut-buttery as I was expecting. Even my Dad who doesn't like peanut butter liked them. They were very easy to make though. Even though it says no bake you do cook the ingredients on the stove-top. This is good news, trust me. It makes it pretty easy to combine ingredients when you have them all heated up! I didn't have enough quick oats, so I used mostly regular rolled oats (my sister and I smashed them up a bit). I don't think this hurt the cookies, but I'ms sure the texture would have been a bit different (better?) with all quick oats. If I make the again I would use all quick oats, less butter and sugar and more chocolate and peanut butter. Definitely more peanut butter.

No Bake Chocolate Peanut Butter Oat Cookies
How I Did It:

Adapted from All Recipes

1 3/4 cups granulated sugar
1/2 cup milk
1/2 cup unsalted butter
4 tbsp unsweetened dutch process cocoa powder (I used 50/50 - natural unsweetened/dutch process)
1/2 cup smooth peanut butter
1/2 cup quick oats
2 1/2 cups rolled oats
1 1/2 tsp vanilla

1. Lay out a large silicon mat or a large sheet of parchment paper on your counter for later use.

2. In a saucepan, combine milk, sugar, butter, and cocoa. Bring to a boil and cook for 1 1/2 minutes.

3. Remove from heat and immediately stir in peanut butter, oats and vanilla.

4. Drop by heaping tablespoonfuls onto the prepared mat/parchment paper. Let cool and harden before eating or transferring to a airtight container. Store at room temperature.


Friday, January 11, 2013

Protein Snack Bites


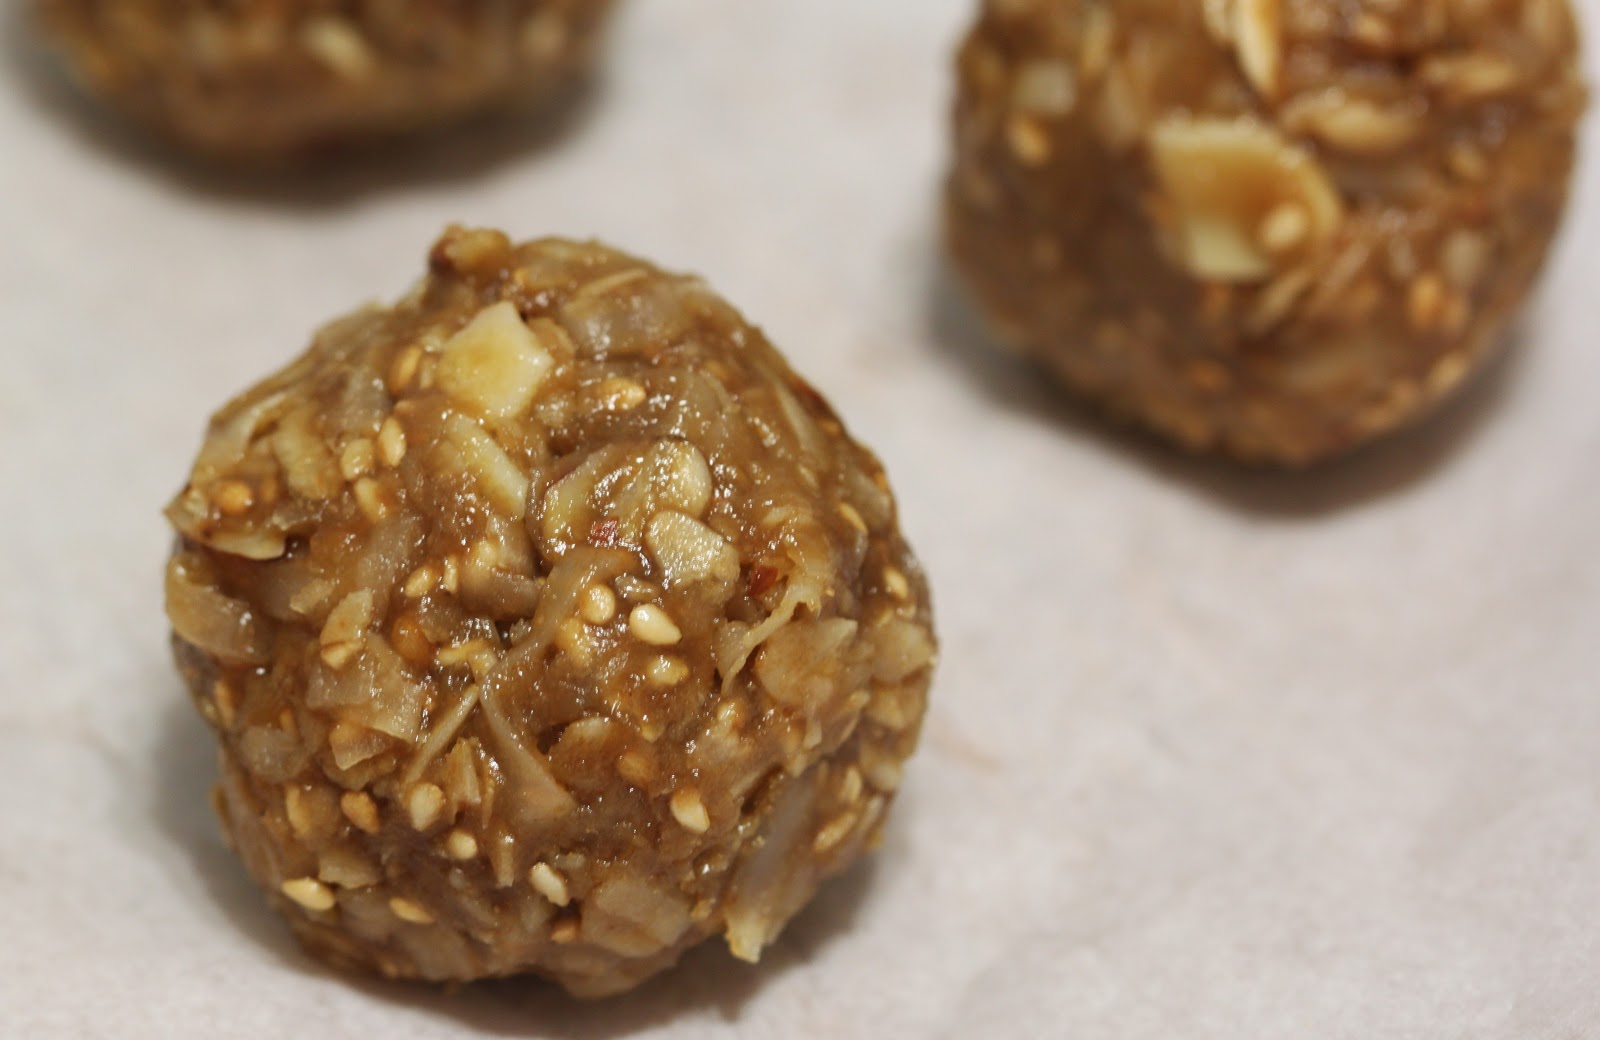
I was so happy with how these turned out! I have made other small protein/snack bites before, but hadn't tried anything new in awhile. They are sweet without being too sweet, slightly crunchy while still being soft and creamy, full of protein, but still very tasty! I had sunflower seed butter on hand (as Trader Joe's had been out of almond butter) and I loved the flavor! Have one if you're a little hungry, have four if you need something more substantial, but don't have the time for a meal. They were perfect to have on a windy and cold summit (I had three at once) and great for after climbing gym snacks (I had one to two). Easy to make, easy to eat and completely made for customization!


Protein Snack Bites
How I Did It:


1/2 cup sunflower seed butter
1/3 cup honey
2 tsp vanilla
1/2 cup rolled oats
1 cup coconut
2 tbsp chopped pecans
1/4 cup slivered almonds
1/4 cup toasted sesame seeds

1. In a large bowl mix together sunflower seed butter, honey, and vanilla. Stir well to combine.

2. Stir in oats, coconut, pecans, slivered almonds and toasted sesame seeds. Make sure everything is evenly distributed.

3. Cover bowl and place in the refrigerator for 30 minutes (after you taste test it).

4. Remove from refrigerator and roll into tight balls. You can eat it as it is of course, but I recommend letting it firm up in the refrigerator for a bit. Store in the refrigerator in an airtight container.


Thursday, July 12, 2012

Funfetti Rice Crispy Treats


Do you feel like you're at a kid's birthday party? I did make this for a party...a party with all adults. We are never too old to have fun desserts! I needed something I could make in a hurry and the first thing that came to mind were rice crispy treats. I've seen pictures of cake batter or Funfetti rice crispy treats on Pinterest, so I thought I'd throw in some cake mix and sprinkles to jazz them up a bit. Definitely made them more fun and while you could taste the cake batter, I think I will add even more next time!

Funfetti Rice Crispy Treats
How I did it:


4 tbs (1/2 stick) unsalted butter
1 10 oz bag mini marshmallows
3/4 cup Funfetti cake mix
6 cups rice crispy cereal (Rice Krispies or generic)
heaping 1/2 cup of sprinkles

1. Coat a 9x13" baking pan with oil and set aside.

2. Melt butter in a medium/large saucepan.

3. Pour in marshmallows and stir until completely melted and combined.

4. As soon as the marshmallows are all melted, stir in the cake mix.

5. Stir in cereal and mix until evenly coated and then add in a little over 1/4 cup of the sprinkles.

6. Spread evenly into the prepared baking pan. Sprinkle with remaining sprinkles (ha-ha) and press down to flatten/even out. Wait 30 minutes and then cut into bars.

Tuesday, April 17, 2012

Spring Chocolate Bark


How can you make candy taste better you ask? Mix it with other candy of course!


My shattered eggs ready to be smashed into chocolate

I love having a bit of chocolate after dinner, but as much as I love to bake, I don't tend to bake just for myself. Partially because it seems silly to go through all that work just for me, and partially because I know I won't be able to finish whatever I make before it starts to decline in flavor and texture. The perfect alternative is solid chocolate candy and often that is what I use to settle my cravings. The post-Easter candy sales this year got me thinking. If I combine a bunch of different candies together I would create something that not only tasted fantastic (hopefully), but also would last as long as I needed it to.


I didn't really have a plan when I started other than to have a flavored milk chocolate base with lots of different Easter candies crumbles on top. I ended up with two base layers...one with a mix of milk chocolates, caramel, peanut butter, and a bit of marshmallow and the other thinner layer just milk and semi-sweet chocolate melted together. Those flavors combined with the "toppings" make this one bark that really has a lot of flavor. It's perfect for an after-dinner chocolate craving!


Spring Chocolate Bark

How I Did It:


12 ounces solid milk chocolate 
4 ounces semi-sweet chocolate
6 ounces peanut butter filled chocolate squares (not peanut butter cups)
6 ounces caramel filled chocolate squares
4 chocolate covered marshmallow bunnies 
3.5 ounces white chocolate mini-malted milk eggs
3 ounces coconut M&M's
8 bite-sized peanut butter cups
3 ounces Mini Cadbury Eggs (not the creme eggs)
2.5 ounces Reese's Pieces eggs

1. Take out your smallest jelly roll sheet (baking sheet with a small edge) and set aside. If you don't have a baking sheet with a lip/edge, you can use a casserole dish (you will just end up with a thicker bark).

2. Break the malted eggs, M&M's, peanut butter cups, mini Cadbury eggs, and Reese's Pieces up into halves and quarters. I used a knife to cut up the peanut butter cups and malted eggs and the rest I put into a zip-lock bag and hit with a pestle. Don't go to crazy -  you want large pieces, not crumbs and it looks better if you leave a few whole. Dumb all of the pieces into a bowl and mix up and set aside.

3. Melt 8.5 ounces of milk chocolate (in any form) in a double boiler. If you using chunks of chocolate, be sure to break up first. As soon as it starts to melt a bit add peanut butter and caramel filled chocolate squares along with the chocolate covered marshmallow bunnies. Stir until just smooth and pour on the baking sheet, spreading out evenly. Put the double boiler back on the heat and melt rest of the milk chocolate and the semi-sweet chocolate. Stir until melted and smooth and  pour directly over the first chocolate mixture. Smooth out as evenly as you can.

4. Take the candy pieces and generously sprinkle over the melted chocolate layers. Try to be as even as possible and when through gently press down on the candies.

5. Place in the fridge to set. Once harden, cut into pieces. Don't worry about being even, they look better if they are different sizes that aren't perfect rectangles. Store in the fridge.

Tuesday, April 10, 2012

Spring S'mores Bars


Whenever I am making a dessert for a family gathering it is always something of an ordeal. Okay, I am being dramatic, but I prefer making treats that everyone (or most normal people) would enjoy and between my dad and sister that automatically rules out: caramel, peanut butter, coconut, mint, and nuts. Yes, all of the most popular chocolate dessert additions. Way to ruin my baking fun guys! Luckily they both do like chocolate or we would have a situation.

For Easter I told my great aunt that I would make a fun Eastery dessert. Immediately I thought of my s'mores bars and subbing in the pastel marshmallows instead of the plain whites ones. It is so quick and easy to whip up, but it is really one of my favorites desserts I have made. The chocolate is so creamy and is a perfect fit with the graham crackers and especially the marshmallows. Every time I make it I am wowed by how great such a simple dessert can taste!


As it turns out colored mini marshmallows are much harder to find than I expected. I won't tell you how many stores I went to, but finally I found them at Target. What I didn't realize was multi-colored marshmallows are actually fruit flavored. Boo. After a taste test and a dunking in melted chocolate test I found that only the green and the pink would be usable so I picked them out and combined them with some plain white minis. Any suggestions for lemon and orange flavored marshmallows?

I know the amounts seem crazy, but I wanted to make a larger quantity. You could easily cut the recipe in half and instead use a 9" square pan instead - that's what I usually do and it turns out just as well (a bit thinner though).


Spring S'mores Bars

How I did it:


1 cup heavy cream (heavy whipping cream works well)
2 bags (about 24 oz) milk chocolate chips
7 cups mini-marshmallows (I used 2 white and 5 green/pink)
13 oz fudge covered graham crackers (not to be confused with chocolate graham crackers)

1. Cover a 9x13 baking dish with aluminum foil and set aside.

2. Pour the cream into a pot and heat just until bubbles start to form and then remove from heat. {Important: Do not walk away from the cream - it boils over very quickly and then you will not only lose all your cream, but have quite a stinky mess on your stove!} Remove from heat and pour in the chocolate chips and stir until fully incorporated and smooth. Let sit for 10 minutes, stirring every few minutes so it doesn't harden.

3. Add marshmallows - stir until well coated. Gently stir in the graham crackers until also well combined.

4. Pour mixture into the prepared pan and smooth out evenly, pressing down lightly. Refrigerate until set. Cut and serve!

Keep in mind the bar will taste best the first day or two. After that they still taste great, but the graham crackers will start to soften. {Read: I'd still eat them, but would not serve them}

Monday, April 2, 2012

Chocolate Peanut Butter Easter Eggs


There's something about baking with a theme that is fun, and holiday themed desserts have a very short lifespan (okay, fine...except Christmas). Since Easter is next weekend I wanted to take advantage and make small Easter themed treats that I could bring over my friend's house. There were only going to be 4 or 5 of us, so I didn't want to make a bunch of cupcakes or cookies that I would run the risk of being sent home with. I mean, I love leftover sweets, but there are only so many a girl can eat in a day...even me.

Candy is great b/c you can make it any quantity you desire and it generally lasts longer than other desserts. I made 14 small eggs, but you could easily make more (or less, but they keep for awhile in the fridge and once you taste them you will wish you had made more). They are like peanut butter cups, but much better.

I like to mix chocolates together - I think it creates a deeper flavor, but you could just use all semi-sweet or milk chocolate. Keep in mind the better the quality of chocolate the better your candies will taste. For the decoration I just used "snowflake" decor sprinkles that I already had and picked out all of the spring colors and just used those. There are lots of other fun options though...pastel sprinkles, sugar, mini nonpareils, small candies etc. You could even melt and dye some white chocolate and drizzle it on top!


Chocolate Peanut Butter Easter Eggs

How I did it


2 1/2 tablespoons butter - softened
1/2 cup creamy peanut butter
1 1/8 cups powdered sugar
3/4 cup coconut flakes
1/8 cup 60% cacao chips
1/4 cup semi-sweet chips
3/4 cup milk chocolate chips
pastel colored sprinkles or decorative candies


1. In a small to medium sized bowl, beat butter and peanut butter together until lightened and creamy. Slowly add in 1 cup of the powdered sugar. Once well combined stir in coconut flakes.


2. Place the peanut butter mixture on a surface lightly covered with powered sugar. Work in more powdered sugar as needed to be able to work with the mixture. Form into about 14 egg shaped balls and place on a cookie sheet in the freezer.


3. After about 30 minutes, with the peanut butter eggs still in the freezer, prepare a second cookie sheet with a piece of parchment paper and set next to the stove. Melt the chocolate in a double boiler. Make sure the water is not boiling too heavily and you do not get any water or steam into your chocolate. Once melted and creamy take one egg out the freezer at a time and dunk and full coat in the chocolate. Remove with a fork and gently set on the parchment paper. Immediately sprinkle with your desired decorative candy topping. Repeat for all eggs and return to freezer to harden (about 30 minutes). Store in a container in the fridge and take out only when serving.

Monday, March 26, 2012

White Chocolate Covered Cheesecake Strawberries


Cheesecake and fruit. These were the first two things my friend listed when I mentioned my plan to make him something for his birthday. Immediately I thought of those cheesecake stuffed strawberries that have been all over Pinterest. Yes, of course they look good, but not overly exciting. Not enough cheesecake filling! So, I decided to take strawberries, split them in half, pile on the cheesecake filling, cover them back up and then dunk them in white chocolate. If it were for myself I would have done milk chocolate, but I know he is a fan of white chocolate and I thought it would look nicer anyway. I didn't want to make the filling too sweet since I was also dunking in white chocolate, but you could easily add more powdered sugar as you go along if you find it is not sweet enough for you.

Not wanting to overwhelm him I only made 8, but you could change the ratios to make more or less. They were a bit messy, but he said they were really tasty. The cheesecake filling alone would make a great fruit dip! Okay, I confess...I dunked a strawberry or two in the leftover filling and I was not disappointed.

White Chocolate Covered Cheesecake Strawberries

How I did it


8 strawberries
5 ounces of cream cheese, room temperature
2 tablespoons powdered sugar
1/2 bag good quality white chocolate chips (I use Ghirardelli)
1/2 tablespoon canola oil (or shortening)

1. Wash, dry, and de-stem the strawberries. Set aside.

2. Beat together cream cheese, powdered sugar and vanilla until creamy.

3. Cut one strawberry at a time down the middle, lengthwise, and clean out any of the white in the middle. Scoop the cheesecake filling onto the freshly cut strawberry half and then lightly press the other half on top. Some filling should be sticking out of the sides and the top. This is good. Place on a tray and repeat for the other strawberries. When complete (it won't take long!) place your tray of cheesecake strawberries in the fridge to let the filling harden up a bit.

4. Pour about 1/2 a bag of white chocolate chips and a small amount of canola oil (you could also use shortening, but I prefer oil)  into a double boiler to melt. Do not let any water mix in or you will ruin your chocolate. You don't necessarily need a full 6 ounces/half bag, but you do want to make sure you have extra in there so there is plenty of white chocolate depth for dipping your your strawberry sandwiches will come apart! Take the strawberries out of the fridge one at a time and  holding at the top (larger) end dunk into the chocolate. Place on a tray and repeat for the rest of the strawberries. When done place the tray in the fridge. Once the white chocolate has hardened you can serve or put in an container to store in the fridge.

Sunday, March 18, 2012

Chocolate Covered Mint Oreos


It was post-dinner on a Friday night and the amount of time I had before needing to head out the door was quickly dwindling. I had wanted to make something sweet to give to my friend, but delays on my commute home limited my options. Cookies were out and something about a bar dessert doesn't really scream, "Happy Birthday." So yes, I decided to cover something in chocolate. Chocolate covered Oreos have the distinction of being ridiculously delicious, very presentable, simple to make in whatever quantity you desire, and just all around quick and easy with great results. Or, at least they should be...

I wanted to go with a St Patrick's Day theme. My idea was this: Mint Oreos with the green center, coated in a layer of dark chocolate, frozen until well set and then covered in a layer of white chocolate. Before the white chocolate set I planned to sprinkle them with green sugar. In my mind, they looked beautiful.
As you can tell, it was a fail. Even though I worked quickly the warm white chocolate immediately and disastrously melted the dark chocolate underneath creating what you see above. I would love to try again as it had the potential to look really neat and it sure did taste good! 
I ended up giving her the best look of the double dipped Oreos (not pictured), and just leaving the rest with the single coat. Next time I'll do the white chocolate first. Any other ideas?

Chocolate Covered Mint Oreos

How I did it:


1/2 bag dark chocolate chips 
1/2 bag white chcolate chips (if you want to be daring)
12 Cool Mint Oreos

1. Prepare a cookie sheet with wax paper and set next to the stove. 

2. In a double boiler, melt half a bag of dark chocolate chips (or more/less depending how much you would like to make). Be careful not to get any water or steam into the chocolate as it will seize and be ruined. Mix with a spoon until smooth. One at a time drop the desired amount of Oreos into the chocolate and flip around with a fork until coated. Carefully remove the Oreos by sliding the fork underneath and lifting out and placing on the cookie sheet. 

3. The Oreos can be put either in the fridge or the freezer to set. Putting them in the freezer ensures that you will be able to eat/transport them within a few minutes. 

4. If you are daring you can repeat the same process with the white chocolate on top and then put them back in the freezer to set again. 


Thursday, March 15, 2012

Chocolate and Caramel Stuffed Rice Crispy Treats


You will soon realize my love for stuffing delicious goodies with other treats is almost equal to my desire to try out new foods (and better ways to make them). It's hard for me to resist, and I will admit, the addition tends to be chocolate. My friends like to tease me that I will decide to make something perfectly lovely and then think, "Must.Add.Chocolate." 

What better way to start out sharing my dessert trials with you all than with a classic dessert (I refuse to call anything with that much sugar and butter a snack, sorry) with a twist! So yes, rice crispy treats are tasty on their own, but they are 10x better with chocolate, of course. This time I decided to add caramel and marshmallows as well. Still a quick and easy dessert to share! Next time I want to try chocolate and peanut butter. Other ideas are swirling as I type this. Any recommendations?

Chocolate and Caramel Stuffed Rice Crispy Treats

How I did it


10 cups rice crispy cereal 
10 1/2 cups mini marshmallows
1/2 cup butter (yes, one whole stick)
1 cup semi-sweet chocolate chips
1 cup milk chocolate chips
1 cup caramels 

1. Coat a 9x13 pan with cooking spray (I use Canola Oil) and set aside

2. Melt half of the butter (1/4 cup) in a medium pot. Once completely melted add 4 cups of marshmallows. Stir until smooth. Add half of the cereal (5 cups) into the melted marshmallow. Add one cup at a time and stir to make sure it is coated evenly. Spread mixture evenly into the prepared 9x13 pan and lightly press down.

3. Cover with 2 1/2 cups of mini marshmallows (should form one layer on top of the cereal mixture)

4. Melt chocolate chips in a double boiler or in a small bowl in the microwave. If you use the microwave, make sure to check the chocolate every 20 seconds as it burns easily and burnt chocolate is worse than awful (trust me). The chips may not look melted, but once they are very shinny you should be able to stir them to finish the job. Pour the melted chocolate evenly (or as evenly as you can) over the marshmallows.

5. Melt caramels in a bowl in the microwave until they are smooth when stirred. Caramel hardens back up rather quickly so make sure you immediately pour it over the chocolate.

6. Melt the rest of the butter (1/4 cup) in a medium pot. Once melted add the remaining marshmallows (snack on the ones from the bag so you still have 4 cups left). Pour, one cup at a time, the remaining cereal (5 cups) into the melted marshmallows. Stir until evenly coated. Spread mixture evenly over the caramel and press down gently to level.

Put in the fridge to set chocolate (30 min) and then cut into squares. Make sure to store in an airtight container. I prefer to serve and store at room temperature so the chocolate isn't as hard.