Showing posts with label coconut. Show all posts

Tuesday, March 24, 2015

Whole Wheat Coconut Chocolate Chip Cookie Bars


Sometimes I get the urge to try to make something a little more healthy. These cookie bars are whole wheat (you need to use some white flour or they will not be tasty to normal people - I have made this mistake) and in place of butter they are made with healthy and delicious coconut oil. The batter was very dry and crumbly which lead me to over-mixing these and making them a little tougher (once completely cooled) than I would have liked (out of the oven they were perfect). Even with that, I still really enjoyed them - I didn't even notice the slight toughness after the first bite. They were beautifully dense with a chewy texture and I loved the hint of coconut flavor. The density and chewiness is assisted by the lack of baking soda/baking powder (they don't rise and get fluffy). Also, due to the use of coconut oil, I think they would be much softer if the temperatures were warmer. I'll test out this theory in a few months. The coconut oil also made the edges very crisp. While I think the whole wheat gives these a hearty taste without being over-powering, if you hate whole wheat stuff, you might want to skip this one. I plan to make other variations of this in the future.

Note: I baked this in a loaf pan as I did not want to end up with too many. If you have more of a crowd, I suggest doubling and baking in a 9x9 pan.


Whole Wheat Coconut Chocolate Chip Cookie Bars
How I Did It:


1/2 whole wheat flour
1/2 + 1/8 cup all purpose flour
1/4 tsp salt
1/2 cup coconut oil, melted
1/4 + 1/8 cup brown sugar
1/4 granulated sugar
1/2 tsp cinnamon
1/2 tsp vanilla extract
1 egg
1/2 cup semi-sweet chocolate chips
1/2 cup milk chocolate chips

1. Preheat oven to 350. Place a piece of parchment paper in your pan, overlapping the edges slightly (so you can pull the bars out easily when they are cooked) and then lightly coat any of the exposed pan and the parchment paper with light oil olive (not virgin - you can also use canola oil). Set aside.

2. In the smaller of two bowl, whisk together the flours and the salt. Set aside.

3. Whisk together (with an electric beater) the oil and the sugars until well combined and then whisk in the cinnamon, vanilla, and egg.

4. Stir in the dry ingredients until just combined.

5. Stir in the chocolate chips and make sure they are well distributed.

6. Place batter into pan and press down to evenly spread it out.

7. Bake for about 20 minutes or until the edges are slightly brown and the center looks center. Remove from oven and let sit for a couple minutes before pulling out of the pan with the parchment paper.

8. Let cool to almost room temperature before cutting into bars. Store in an airtight container.

Thursday, September 4, 2014

Coconut Strawberry Cake


In keeping with the healthy coconut strawberry theme, I give you this addicting cake. This is one of those desserts that is healthy and still tastes really good. It's gluten-free, vegan, and sugar free (aside from natural sugars from the fruit of course), and very refreshing. If you like coconut and strawberry, you will like this easy to make cake!

Coconut Strawberry Cake

How I Did It:


4 tbsp coconut oil, melted and slightly cooled
1 cup almonds, soaked for a few hours in water
4 cups shredded unsweetened coconut
1/2 cup pitted dates, soaked for a few hours in water
3 cups fresh strawberries

1. In a food processor, grind almonds until very fine.

2. To the processor, add 2 tbsp coconut oil, 2 cups coconut, and the dates and process until well combined.

3. Press evenly into the bottom of an 8x8 inch baking pan.

4. Clean out the processor and then place the remaining ingredients ( 2 tbsp coconut oil, 2 cups coconut, and the strawberries, reserving a few for the top if you'd like).

5. Pour the strawberry coconut mixture on top of the crust and even out with the back of a spoon. Slice strawberries in 3rds or 4th and place on top.

6. Cover and refrigerate for a couple hours or overnight before serving.


Tuesday, August 19, 2014

Gluten-Free Coconut Oatmeal Cookies


In making gluten-free treats for other people, nothing is more obvious than some version of an oatmeal cookie. Of course, traditionally oatmeal cookies have flour in them, but it's easy enough to use oat flour instead. I got this recipe from the Vanilla Sugar Blog which always has creative and fun food creations. They didn't turn out crunchy for me at all...more crumbly. I took them out when the bottoms started to deeply brown, but I probably could have kept them baking for a bit longer to crisp up a bit more. They were very tasty though and the texture was fine, just not what I was looking for. It was somewhere between chewy and crunchy...not dry though. If I make them again I would try coconut oil instead of butter, flatten them a little more, and cook them longer.


Gluten-Free Coconut Oatmeal Cookies
How I Did It:


2 cups rolled oats (not quick cooking)
3/4 cup unsweetened shredded coconut
1/2 tsp baking powder
1 tbsp cornstarch
3/4 tsp salt
1/2 cup unsalted butter, softened
1/3 cup granulated sugar
1/3 cup dark brown sugar
1 egg
1 tsp vanilla extract

1. Preheat oven to 375.

2. In a food processor, grind 1 cup of the oats into a flour.

3. Mix together the oat flour, rolled oats, coconut, baking powder, cornstarch, and salt until well combined. Set aside.

4. In a larger bowl, cream together the butter and the sugars until light and fluff and then beat in the egg and vanilla.

5. Slowly beat in the dry ingredients to the wet, until not quite combined. Finish mixing with a spoon until just combined.

6. Roll rounded tablespoon sized chunks of dough into balls and place on the parchment papered or Silmat covered cookie sheet. Flatten the the balls down with the back of a spoon or the palm of your hand.

7. Bake for about 15 minutes or until the edges/bottoms start to deeply brown.

8. Let cook for a few minutes before removing to cooling racks to finish cooling.

Monday, March 17, 2014

Coconut Delight Bars


If you like coconut, you will love these coconut bars. I found them at Chocolate Covered Katie awhile back and I recently made them to the delight of my family. I don't really like the taste of agave on its own, but it works well in here. I think anything else would be too sweet and noticeable. The other good thing about using agave is that it makes these bars friendly to some people who can't handle most other sweeteners (sugar, honey, maple syrup). So easy to make and so easy to eat! If you want, after freezing them, you could dunk them in melted dark chocolate and then freeze them again. I say that because I always have chocolate on the brain, but to be honest, these really don't need it. They are perfect as is.


Coconut Delight Bars
How I Did It:


1 cup shredded unsweetened coconut
1/4 cup agave
2 tbsp coconut oil
3/4 tsp vanilla
1/8 tsp salt

1. Place all ingredients in a food processor and process until well-combined. This will only take ten seconds or so.

2. Pour into the bottom on a loaf pan and press down evenly.

3. Cover and place in the freezer for 20 minutes before cutting into squares. Store in an airtight container in the freezer.

Tuesday, September 24, 2013

Coconut Oatmeal Cookies


In the last year or two I have realized that I am really into coconut. I've been putting coconut into everything that I can think of. Chocolate coconut banana "ice cream" (I'll post the recipe soon), coconut date bars, coconut muddy muddies, and of course coconut cookies. Coconut really makes cookies more flavorful and chewy, even if you don't want it to be the main flavor. Really, it's a win-win.

These cookies were really good, and while I won't claim they are healthy, you do get to use coconut oil instead of any sort of butter. Next time I would try to make them have even more coconut flavor. I mean, never too much coconut, right? Next up coconut pancakes... or maybe oatmeal?


Coconut Oatmeal Cookies

Recipe slightly adapted from Two Peas & Their Pod

How I Did It:


2 3/4 cups all-purpose flour
1 teaspoon baking soda
1 teaspoon baking powder
1/2 teaspoon salt
1 cup granulated sugar
1 cup brown sugar
2 large eggs
1 cup coconut oil (measured solid), melted and cooled (but still liquid)
1 1/4 cup sweetened coconut
1 cup quick oats

1. Preheat oven to 350.

2. In the smaller of your two bowls, whisk together the flour, baking soda, baking powder, and salt. Set aside.

3. In a large bowl, beat together the butter and sugars until light and fluffy. Add in coconut oil, eggs, and vanilla and beat until well combined and fluffy.

4. Beat in the dry ingredients in three parts until just combined.

5. With a large spoon, mix in the oats and coconut until evenly distributed.

6. Place tablespooned sized cookie dough balls onto a Silpat or parchment paper lined baking sheet keeping about two inches apart. Bake for 8-10 minutes or until the cookies are lightly browned and just barely set.

7. Let cookies continue to set on the tray for a couple minutes and then continue to cool on cooling racks.

Friday, March 1, 2013

Double Chocolate Coconut Cookies


I love coconut and of course we know how I feel about chocolate, so I had to try these Double Chocolate Coconut Cookies. I'm happy I added the extra coconut...I probably could have even added more! Do keep an eye on your coconut as you're toasting it as it goes from white to burnt very quickly. Don't skip this step though as it really adds to the flavor and texture. I always slightly under-cook my cookies, but next time I would cook them a bit less even as they weren't as moist as I usually like. Fantastic flavor!


Double Chocolate Coconut Cookies
How I Did It:


1 3/4 cups AP flour
1/2 tsp baking soda
3/4 tbsp baking powder
1/4 tsp salt
4 1/2 tbsp unsweetened cocoa powder
1 1/2 sticks unsalted butter, melted and cooled
1/2 cup + 1 tbsp dark brown sugar, packed
1/2 cup granulated sugar
3/4 tsp vanilla extract
1 egg + 1 egg yolk
1 1/2 cups toasted coconut
1 cup dark chocolate chips

1. In a medium bowl, whisk together the flour, baking soda, baking powder and salt. Set aside.

2. In a large bowl, combine butter and sugars. Add in eggs and vanilla and mix well. Gradually stir in dry mixture until just combined.

3. Gently fold in coconut and chocolate chips until well distributed. Cover with plastic wrap and place in the refrigerator for at least an hour (or overnight).

4. Preheat oven to 350 and line your baking sheets.

5. Scoop batter into rounded balls onto the baking sheet, placing at least 2 inches apart. Bake for about 10 minutes or until the edges are firm, and the center is almost set.

Friday, January 11, 2013

Protein Snack Bites


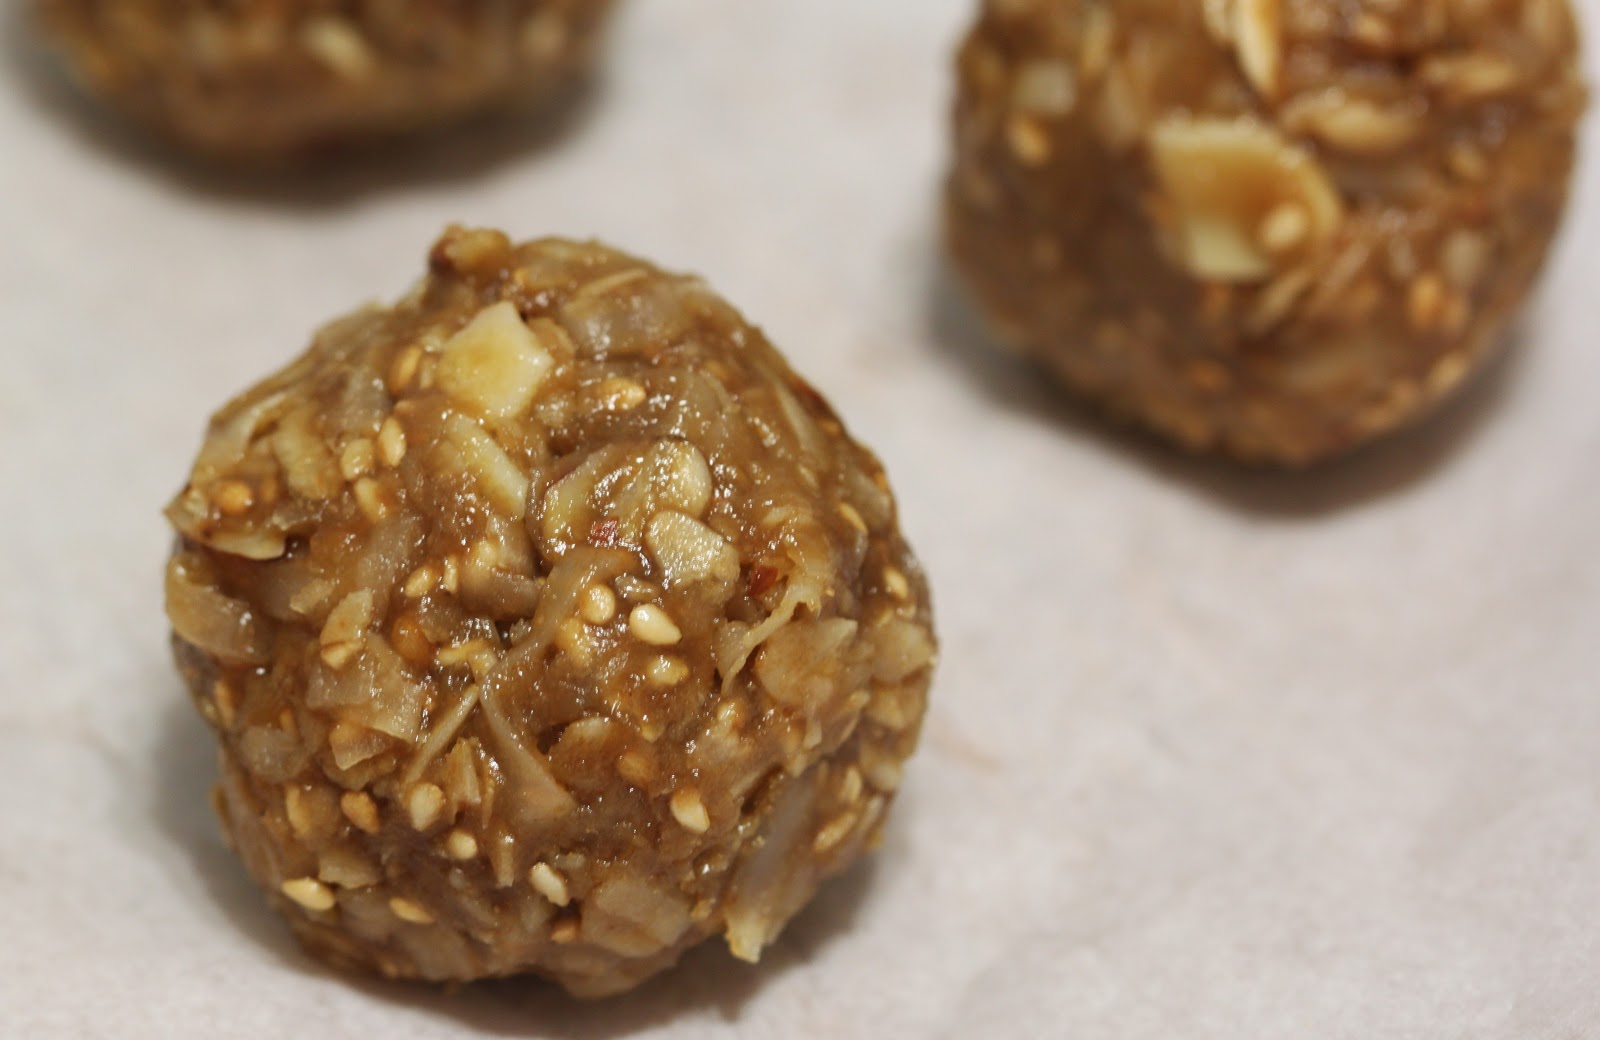
I was so happy with how these turned out! I have made other small protein/snack bites before, but hadn't tried anything new in awhile. They are sweet without being too sweet, slightly crunchy while still being soft and creamy, full of protein, but still very tasty! I had sunflower seed butter on hand (as Trader Joe's had been out of almond butter) and I loved the flavor! Have one if you're a little hungry, have four if you need something more substantial, but don't have the time for a meal. They were perfect to have on a windy and cold summit (I had three at once) and great for after climbing gym snacks (I had one to two). Easy to make, easy to eat and completely made for customization!


Protein Snack Bites
How I Did It:


1/2 cup sunflower seed butter
1/3 cup honey
2 tsp vanilla
1/2 cup rolled oats
1 cup coconut
2 tbsp chopped pecans
1/4 cup slivered almonds
1/4 cup toasted sesame seeds

1. In a large bowl mix together sunflower seed butter, honey, and vanilla. Stir well to combine.

2. Stir in oats, coconut, pecans, slivered almonds and toasted sesame seeds. Make sure everything is evenly distributed.

3. Cover bowl and place in the refrigerator for 30 minutes (after you taste test it).

4. Remove from refrigerator and roll into tight balls. You can eat it as it is of course, but I recommend letting it firm up in the refrigerator for a bit. Store in the refrigerator in an airtight container.


Monday, June 4, 2012

Coconut Blondies


Don't worry, this isn't turning into a "Blonde Brownie" blog. After making the cookie butter blondies someone was asking me what a "bondie" is exactly. I went into a long explanation of a blonde brownie before he stopped me and said, "So, basically a brownie without the chocolate?" Right. Yes. I guess I could have just said that. I also like to think of it as a great (chewy and delightful) vehicle to test out flavors.

After coming back from a weekend of camping I needed a quick dessert to bring to a BBQ (like, very quick). So I whipped up these bad boys while my hair was drying. No, seriously. So simple...and absolutely delicious! Butterscotch, milk chocolate and coconut...such a great (and very tempting) combination.

Coconut Blondies
How I did it:

(makes 16 bars)

1 cup all purpose flour
1/4 teaspoon salt
4 ounces (1/2 stick) unsalted butter
1 cup light brown sugar
1 3/4 teaspoon vanilla
1 cup shredded coconut
3/4 cup of milk chocolate chips
1/2 cup butterscotch chips

1. Place butter in a small bowl and microwave for 1 minute. If the butter isn't completely melted, give it a little stir. Set aside to cool-down a bit.

2. Preheat oven to 350°F. Using canola oil, grease a 8 inch square baking pan and set aside.

3. In a small bowl whisk together the flour and salt. Set aside.

4. Pour melted butter into a larger bowl and mix with the brown sugar until smooth. Add the egg and vanilla and mix well.

5. Stir in flour mixture 1/3 at a time. Add in coconut and milk and butterscotch chips.

6. Bake for about 25 minutes or until the top starts to look golden brown. The top should be set, but the inside should be still very moist (not completely cooked). If you over-bake them they will be dry and more cake-like and not nearly as addicting.

7. Let cool completely before cutting into bars.


Monday, May 7, 2012

Coconut Lime Sugar Cookies


I was so excited when I saw these cookies at My Baking Addiction. Lime and coconut in a cookie - how could it not be fantastic! What a perfect cookie to bring to the Cinco de Mayo party I was attending! Well, the batter was insanely good so I think my expectations got set a bit too high. The cookies themselves are quite good as well, but not exactly what I was hoping for. As they turned out for me, they were a slightly chewy sugar cookie with a hint of lime flavor. If I make them again I will add more lime juice and much more coconut (you couldn't taste the coconut at all) and under-cook them slightly to make them more chewy.

A note on the size. The recipe says to make them into teaspoon sized balls, and I tried that for one batch, but they turned out much too small for my liking (below photo). They also were much less chewy that way and more reminded me of a lime flavored butter cookie. I ended up doing heaping tablespoon sized balls (above photo) for the rest and I preferred that result.


Coconut Lime Sugar Cookies
How I did it:


2 3/4 cups all-purpose flour
1 tsp baking soda
1/2 tsp baking powder
1/2 tsp salt
1 cup (2 sticks) butter, softened
1 1/2 cups white sugar
1 egg
1/2 tsp vanilla extract
Zest of one large lime
3 tbsp lime juice
1/2 toasted coconut
1/2 - 3/4 cup white sugar (for rolling the batter)

1. Preheat oven to 350 degrees. Line cookie sheets with parchment paper and set aside.

2. In a medium mixing bowl, whisk together the flour, baking soda, baking powder, and salt.

3. In a separate bowl, beat together the butter and sugar until smooth and fluffy. It will crumble at first, but after a few minutes it will become fluffy-looking.

4. Beat in egg, vanilla extract, lime juice, and lime zest until well combined.

5. Gradually beat in the dry ingredients and the toasted coconut. Be careful not to over-mix.

6. Roll rounded tablespoonfuls of dough into balls. Place sugar in a very small bowl and roll the dough balls in the sugar until well coated. Place on the cookie sheet at least 2 inches apart and bake for about 10 minutes, or until edges are light brown and the cookie starts to crack.

7. Let cookie set on sheet for a minute or two and then remove to cooling rack.

Monday, April 2, 2012

Chocolate Peanut Butter Easter Eggs


There's something about baking with a theme that is fun, and holiday themed desserts have a very short lifespan (okay, fine...except Christmas). Since Easter is next weekend I wanted to take advantage and make small Easter themed treats that I could bring over my friend's house. There were only going to be 4 or 5 of us, so I didn't want to make a bunch of cupcakes or cookies that I would run the risk of being sent home with. I mean, I love leftover sweets, but there are only so many a girl can eat in a day...even me.

Candy is great b/c you can make it any quantity you desire and it generally lasts longer than other desserts. I made 14 small eggs, but you could easily make more (or less, but they keep for awhile in the fridge and once you taste them you will wish you had made more). They are like peanut butter cups, but much better.

I like to mix chocolates together - I think it creates a deeper flavor, but you could just use all semi-sweet or milk chocolate. Keep in mind the better the quality of chocolate the better your candies will taste. For the decoration I just used "snowflake" decor sprinkles that I already had and picked out all of the spring colors and just used those. There are lots of other fun options though...pastel sprinkles, sugar, mini nonpareils, small candies etc. You could even melt and dye some white chocolate and drizzle it on top!


Chocolate Peanut Butter Easter Eggs

How I did it


2 1/2 tablespoons butter - softened
1/2 cup creamy peanut butter
1 1/8 cups powdered sugar
3/4 cup coconut flakes
1/8 cup 60% cacao chips
1/4 cup semi-sweet chips
3/4 cup milk chocolate chips
pastel colored sprinkles or decorative candies


1. In a small to medium sized bowl, beat butter and peanut butter together until lightened and creamy. Slowly add in 1 cup of the powdered sugar. Once well combined stir in coconut flakes.


2. Place the peanut butter mixture on a surface lightly covered with powered sugar. Work in more powdered sugar as needed to be able to work with the mixture. Form into about 14 egg shaped balls and place on a cookie sheet in the freezer.


3. After about 30 minutes, with the peanut butter eggs still in the freezer, prepare a second cookie sheet with a piece of parchment paper and set next to the stove. Melt the chocolate in a double boiler. Make sure the water is not boiling too heavily and you do not get any water or steam into your chocolate. Once melted and creamy take one egg out the freezer at a time and dunk and full coat in the chocolate. Remove with a fork and gently set on the parchment paper. Immediately sprinkle with your desired decorative candy topping. Repeat for all eggs and return to freezer to harden (about 30 minutes). Store in a container in the fridge and take out only when serving.